

The original post we wrote here discussed viewing images as a filmstrip, an obsolete term now, no doubt(!), because that's what it was called until Microsoft launched Windows 7.
Today, images can be viewed as a slide show using the Windows Photo Viewer, so let's get started.
Go to Computer and Find the Images Folder
First we find the folder that contains the images we wish to view as a slide show. Click the Start button and click Computer. Or you may have an icon in the Quick Launch toolbar to go Computer.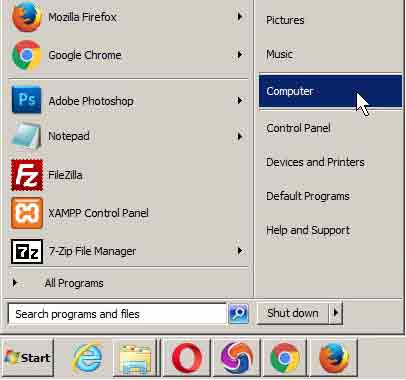
Then click on the folder where the images are stored.
Select the Image to Kick Off the Slide Show
It doesn't matter what image you begin with. The Windows Photo Viewer will continuously scroll through the images in the folder until you exit the window.To begin the slide show, right-click on an image file and click Preview - as shown below.
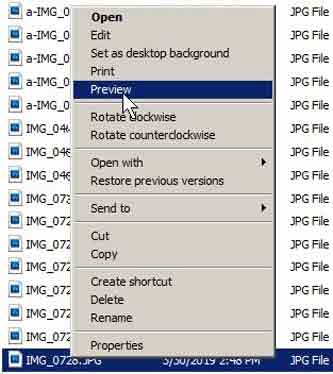
The selected image is now shown in the Windows Photo Viewer window.
Begin the Photo Slide Show
In the Windows Photo Viewer, shown below, notice several things. First, the name of the current photo displays on the top bar. Then notice the controls at the bottom of the window.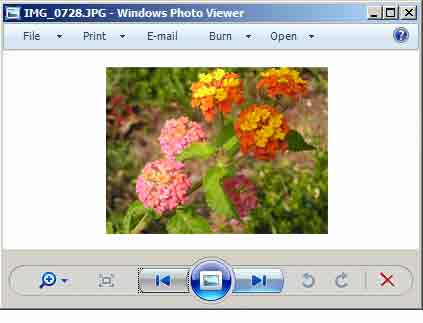
The magnifying glass at left allows you to zoom in on the current photo, and the second icon fits the current image to the window, which you can resize of course. And the right most icons allow you to rotate the image, and exit the viewer.
The center icons are what we are focusing on today. The left arrow begins the slide show progressing up the list of images in the folder, and the right arrow shows the images in the folder proceeding downward through the list of image files.
The large middle icon, when clicked, explands the Windows Photo Viewer full screen, and the images automatically scroll about every 4-6 seconds. Click anywhere in the window to move to the next image. To exit full screen, press the Esc key.
This is a neat feature - especially if your PC is attached to a TV. It's a great way to show off your photos on the largest video screen you have!
Thanks for stopping by. Cheers!
Below is the original article about viewing images with Windows Filmstrip: When viewing your files in Windows via My Computer or Windows Explorer, you can view them, typically, in five different ways: Thumbnail, Files, Icons, List, and Details.
If you are not familiar with the Views menu, see our blog Cool Ways to View Your PC Files
However, there is a very cool viewing option that only appears on the Views menu when you are viewing the contents of a folder with many images. This is the Filmstrip viewing option!
When you click Filmstrip, the thumbnails of the images in the folder display horizontally at the bottom of the window, and a large version of the active thumbnail displays at the top of the window - as shown below. In real life the large image would be larger than shown because I had to make my illustration small enough to fit this blog post.
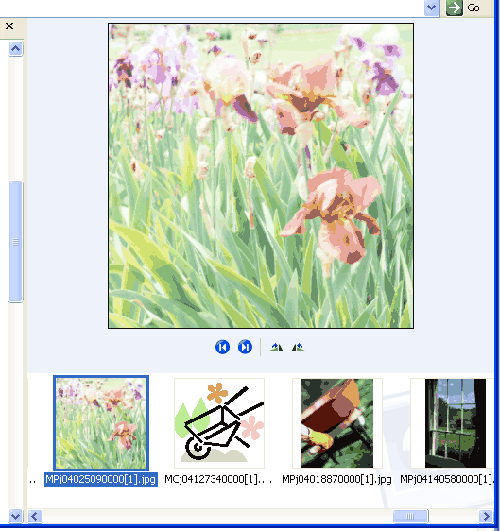
You use the left and right arrows to scroll through the images in the file. And there are little icons that allow you to rotate the image. This is a nice way to be able to view a folder of photographs of a trip or event.
If you are using Filmstrip to hunt for a particular image, when the desired image pops up, just double-click on the thumbnail and the image will open in your image-editing program.
Cool, huh.
► Take a look at some of our other interesting posts, such as How to Change Cell or Column Widths in Excel
1 comment:
I sometimes preview a photo, but never noticed the other icons. Nice feature for sure!
Post a Comment